|
FileTools 6.3.xxx |
Read this section carefully!
Introduction to FileToolsFileTools 6.3.xxx is a collection of utilities for managing files on your hard disc. The collection of routines includes trivial functions to: batch-edit
file and folder names, print file and folder lists, change file dates etc. |

Of the 29.000 image files in the root picture folder, 22.466 have file names starting with a P. Of these, all pictures taken with my old
Panasonic DMC FZ20 camera have been selected for renaming by replacing the P-prefix with FZ20_ as follows: P1023456.jpg -> FZ20_1023456.jpg
Description of the Compare function |
|
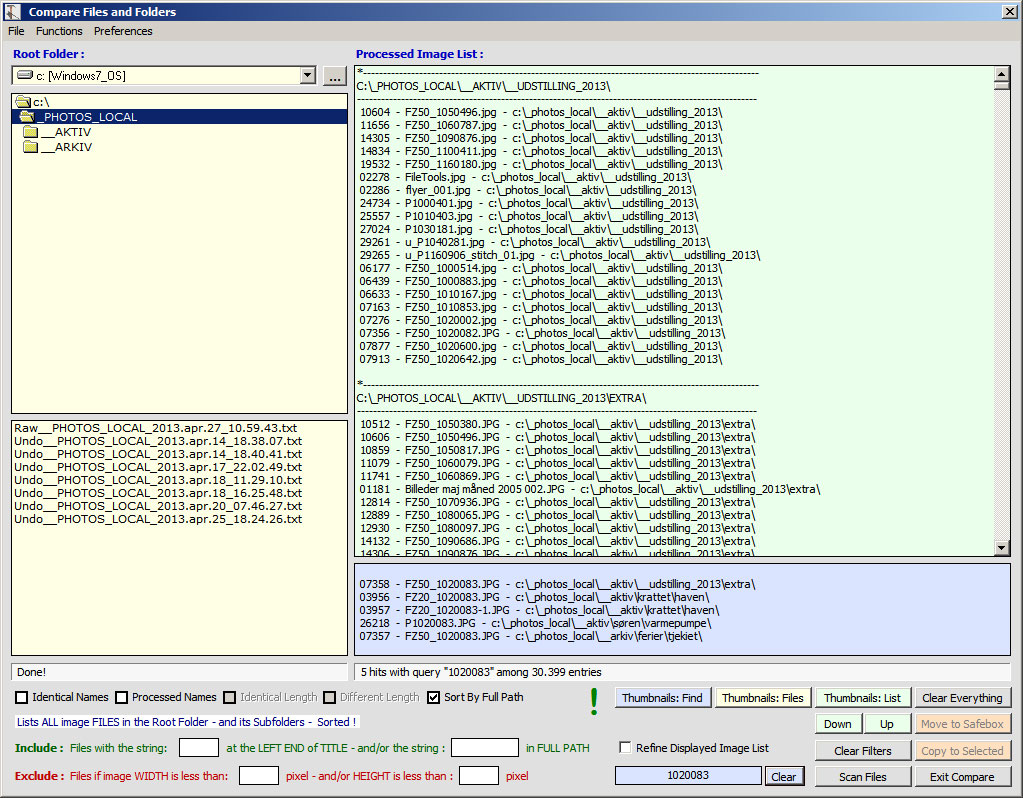
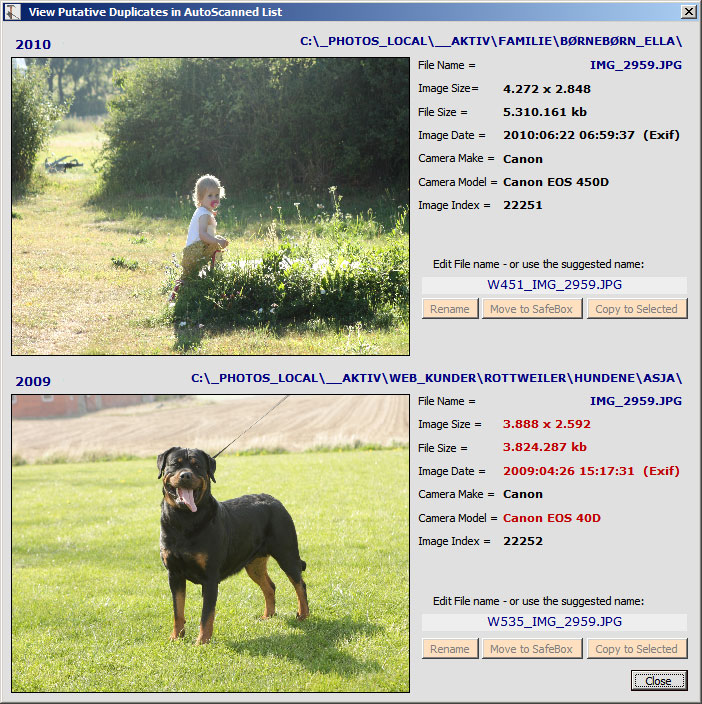
The main form of the Compare function. The criteria for selecting images from the root folder include: Identical and Processed file names (i.e., file names only differing by the very rightmost characters of the file title) and Identical Length or Length not considered. The list may be sorted by the full path of the image file names without considering the full path. The form contains a search option and options for displaying selected files in the list as thumbnails: In the compare form shown above, a complete, sorted file list has been created. The search string: "1020083" retrieves five files with their full path, all including the search string. As the image files in this example have been renamed by replacing the leading P with FZ20_ for pictures taken by my old Panasonic camera, with FZ50_ for files taken with the second Panasonic camera. Pictures taken with the new Panasonic camera still have their original leading P in the filename. This search result illustrates the problem with duplicate filenames: Without renaming my image collection would have included 4 identical filenames for 4 different images! The 5th file (FZ20_1020083-1.jpg) has been auto-renamed by Picasa but is the same image as image FZ20_1020083.jpg Example 2: Setting a checkmark in Identical Names and one in Different Length and clicking Scan Files retrieves a list of duplicates in your picture collection. Double clicking the top member of a pair displays the image pair in a separate form with selected Exif data. In this example, the identical filenames IMG_2959.jpg represents two different images! To avoid overwriting one with the other thus loosing one of the images, it would be a good idea to rename the image files. |
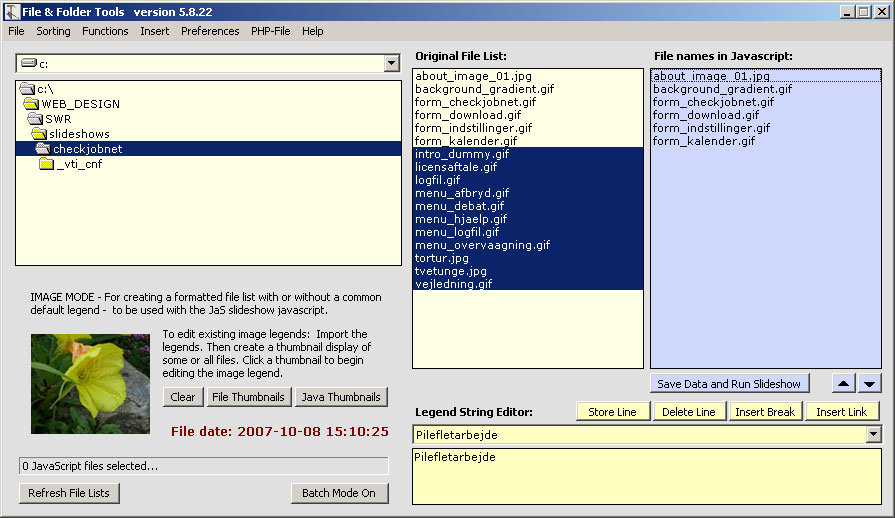
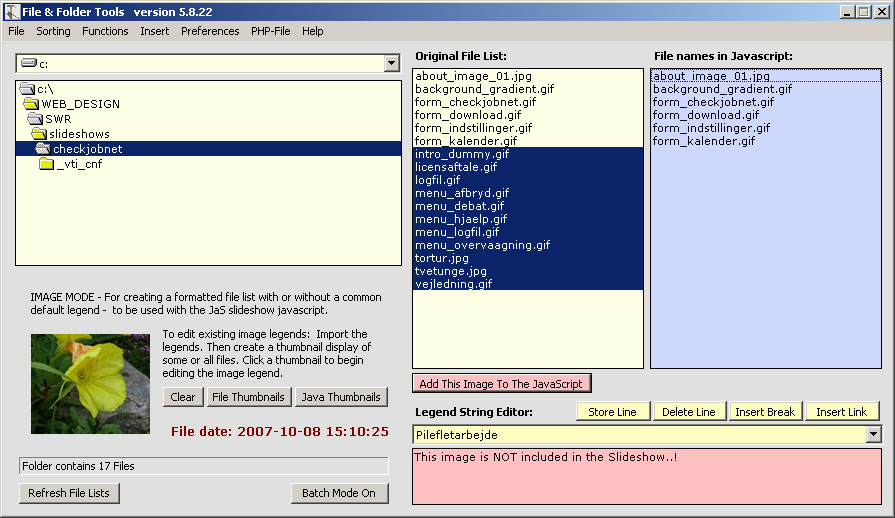
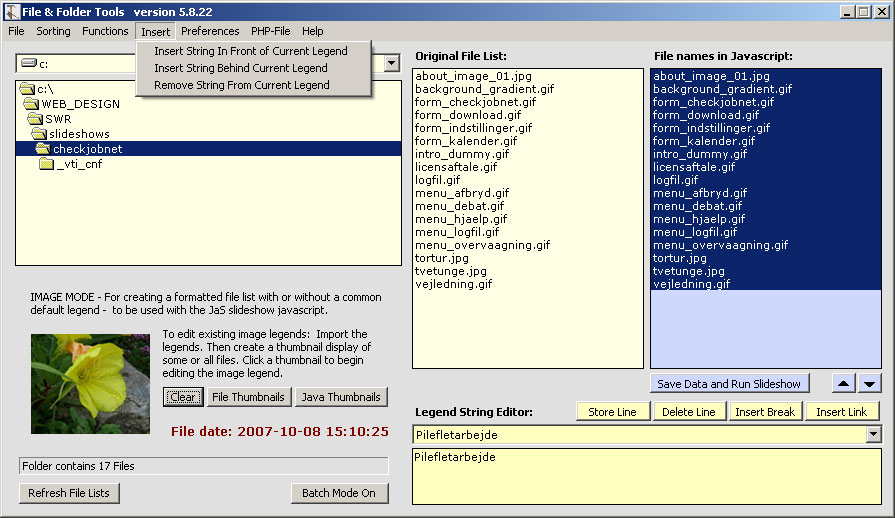
Description of the SlideShow editorThe main form for managing image legends with the JaS JavaScriptThis part of the manual deals with the facilities for editing and managing image legends for JaS slideshows. The main form is shown below and consists of navigation options allowing you to open the content of the folder containing the files necessary for running a JaS slideshow: a php file which is the file to link to from other pages of your website and a js-file which includes the JavaScript code with a "legend block" containing the text to be associated with each image. Finally the slideshow folder contains the image files to be displayed in the slideshow. The right part of the main form contains two list boxes: The left list box lists all image files in the folder and the right list box the file names of image files extracted from the legend-block of the js-file. Double-clicking a file name in either of the two list boxes retrieves the selected image. For the image files extracted from the js-file, the displayed image also includes the legend associated with the image. |
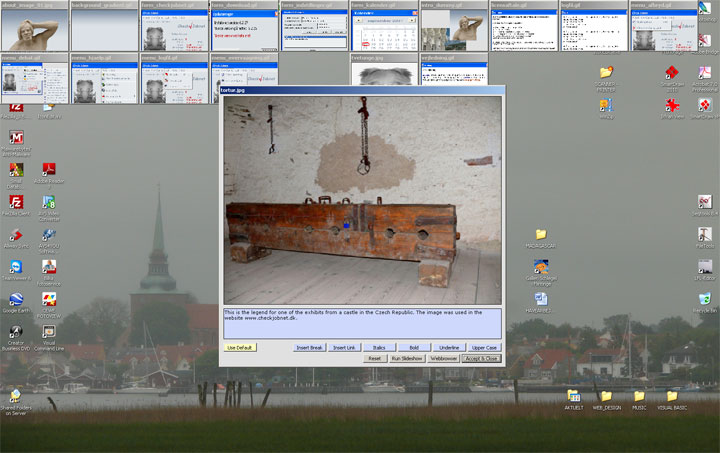
Adding new image files to the screenshowAn example of the image legend editor in action: All the image files extracted from the JavaScript are displayed on the screen. One of the top-row thumbnails has been clicked and the image is displayed in the form for editing the legend. The image can be reduced - without saving any changes - to a thumbnail again simply by clicking the image. |
The Insert menu of the main formAn example of the image legend editor in action: All the image files extracted from the JavaScript are displayed on the screen. One of the top-row thumbnails has been clicked and the image is displayed in the form for editing the legend. The image can be reduced - without saving any changes - to a thumbnail again simply by clicking the image. |
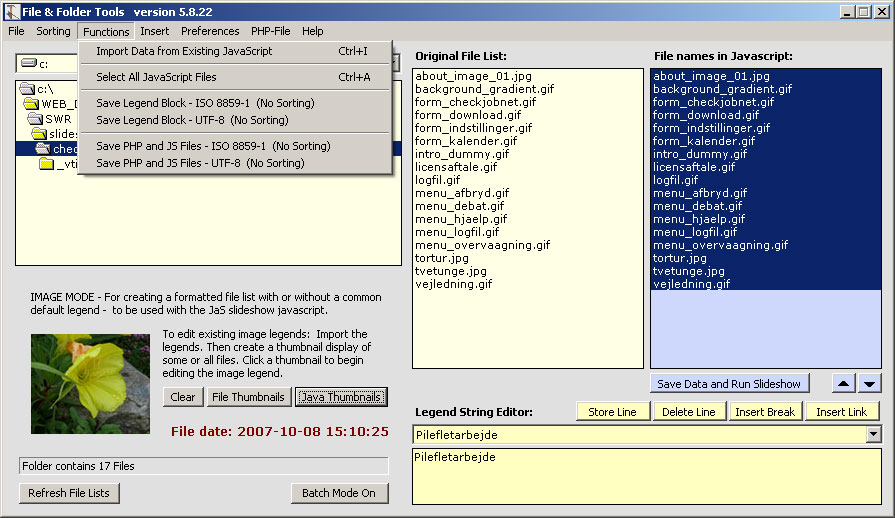
The Functions menu of the main formAn example of the image legend editor in action: All the image files extracted from the JavaScript are displayed on the screen. One of the top-row thumbnails has been clicked and the image is displayed in the form for editing the legend. The image can be reduced - without saving any changes - to a thumbnail again simply by clicking the image. |
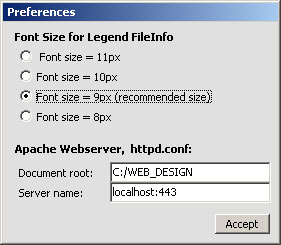
The Preferences formAn example of the image legend editor in action: All the image files extracted from the JavaScript are displayed on the screen. One of the top-row thumbnails has been clicked and the image is displayed in the form for editing the legend. The image can be reduced - without saving any changes - to a thumbnail again simply by clicking the image. |
Thumbnails of images extracted from the JavaScriptAn example of the image legend editor in action: All the image files extracted from the JavaScript are displayed on the screen. One of the top-row thumbnails has been clicked and the image is displayed in the form for editing the legend. The image can be reduced - without saving any changes - to a thumbnail again simply by clicking the image. |
|
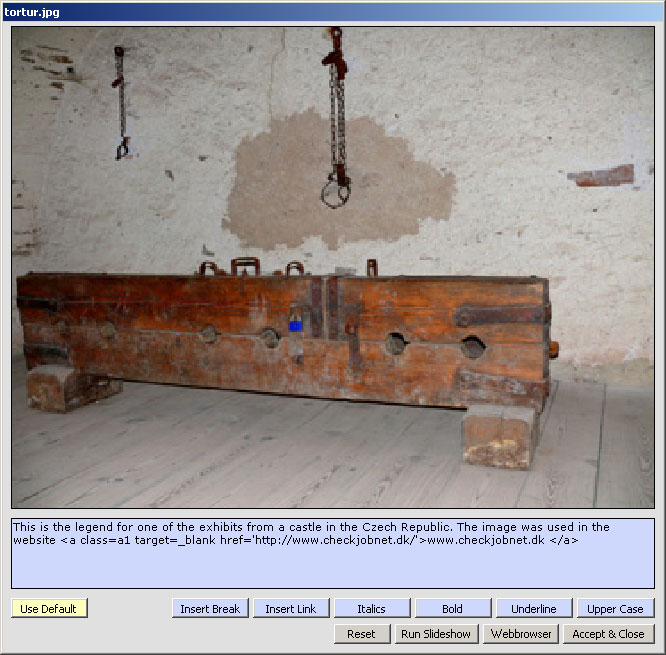
The three command buttons labeled: Clear, File Thumbnails and Java Thumbnails controls the display of image files as thumbnails for the selected image(s) in either of the two list boxes - or closes all the displayed thumbnails. Editing image legendsClicking a thumbnail enlarges the image. If the thumbnail is from an extracted JavaScript image including a legend, the enlarged image includes a text field below the image which contains the current legend for the image. |
|
In the text field you can edit the legend, add links and apply different font attributes. You can inspect the legend as HTML by clicking the Webbrowser command button (see next paragraph) or run the slideshow by clicking the Run Slideshow command button. When you are satisfied, click the Accept & Close command button to save the changes. The legend for the image can be formatted as html (in a separate form) as shown below to enable you to test links and font attributes during editing the legend. |
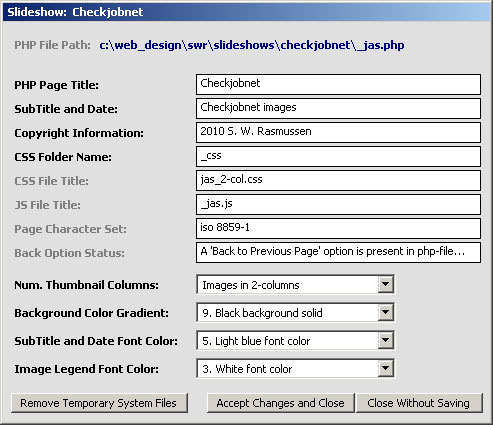
Editing the php file of the slideshowThis form displays some of the php-file parameters such as: Page Title, Page Sub-Title,
Copyright Information, CSS File Name, JS File Name, Character Set and
Back Option Status.
|
|
In addition the form includes a function to: Remove Temporary System Files which clears the slideshow folder of the backup and temporary files created during editing image legends and the php-file. Every time you save changes to the slideshow, the old files is retained as a safety precaution. This implies that a large number of backup copies of edited files accumulate in the slideshow folder. Clicking the Remove Temporary System Files command button deletes all safety copies in the folder. The second option: Accept Changes and Close command button implements the changes you have
made to the slideshow by making the specified corrections to the php and JavaScript files in the
slideshow folder and modifying the css files and the background color jpg file controlling background
color of the all the individual slideshows in your slideshows folder. |
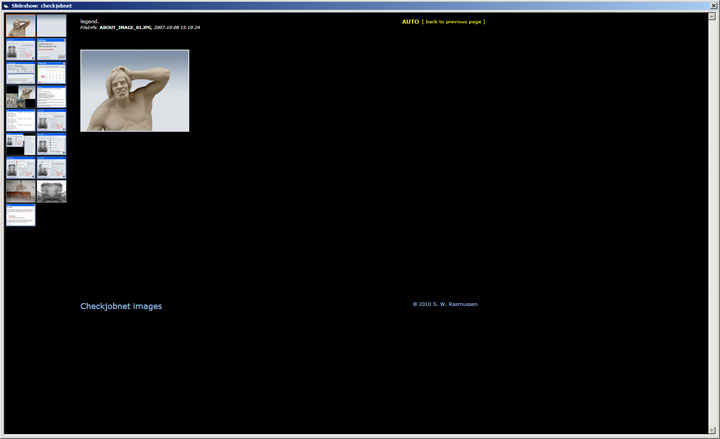
A slideshow generated by File ToolsAn example of the image legend editor in action: All the image files extracted from the JavaScript are displayed on the screen. One of the top-row thumbnails has been clicked and the image is displayed in the form for editing the legend. The image can be reduced - without saving any changes - to a thumbnail again simply by clicking the image. |

The same slideshow with a black backgroundAn example of the image legend editor in action: All the image files extracted from the JavaScript are displayed on the screen. One of the top-row thumbnails has been clicked and the image is displayed in the form for editing the legend. The image can be reduced - without saving any changes - to a thumbnail again simply by clicking the image. |
A detailed 'Step-By-Step' instructionIf you want to include a JaS slideshow in your website proceed as follows:
at this point, the default JavaScript does not contain any image files. The left list box on the other hand contains all the image files you copied to the slideshow_01 folder Proceed until you have added all the images you want to include in your slideshow. When you are done, it is a good idea to save the project: Click Functions/Save PHP and JS Files - ISO 8859-1 (no sorting) to save the two JaS system files. Then you are ready to begin writing legends to the images in your slideshow
Now you only have to edit the php file to complete the process. The default name of the php file is: jas.php but the file can have any name you choose as long as it has the extension: php
The FileTools program is free-ware and can be downloaded here: FileTools 6.3.xxx setup file |